Lip care is a vital aspect of personal grooming, yet it often gets overlooked until chapped, dry, or peeling lips demand attention. A lip balm is a simple yet powerful solution to keep your lips hydrated, soft, and nourished. While store-bought options are convenient, they often contain artificial ingredients or lack the person y al touch of a homemade alternative.
Crafting your own herbal lip balm not onlgives you full control over the ingredients but also allows you to infuse it with luxurious scents, healing herbs, and aesthetic elements that turn an everyday product into something special.
Why Should You Make Herbal Lip Balm at Home?
Making herbal lip balm at home offers a wealth of benefits that go beyond simply having a functional beauty product. Whether you’re looking to avoid synthetic chemicals, personalize your skincare, or indulge in a bit of creative self-care, DIY herbal lip balm is a gratifying and practical choice. Here are some key reasons why you should consider crafting your own lip balm at home:
1. Full Control over Ingredients
When you make your own lip balm, you have complete control over what goes into the product. Commercial lip balms often contain synthetic chemicals, preservatives, and fragrances that can irritate sensitive skin or contribute to long-term skin dryness. Homemade lip balms, on the other hand, allow you to use natural ingredients like beeswax, she butter, and infused herbal oils, ensuring that your lip care is both nourishing and free from harmful additives.
2. Personalization for Specific Needs
Everyone’s lips have unique needs. Some people struggle with dry, cracked lips, while others want a balm with a subtle tint or fragrance. Making your own lip balm gives you the ability to tailor the formula to meet your specific preferences. You can experiment with different essential oils, such as soothing lavender for sensitive lips or invigorating peppermint for a refreshing sensation. You can also incorporate honey or vitamin E for added moisture and healing properties.
3. Cost-Effective and Eco-Friendly
Store-bought herbal lip balms, especially those made from high-quality organic ingredients can be pricey. By making your own, you save money while still enjoying the benefits of premium, natural ingredients. Additionally, DIY lip balms are typically packaged in reusable or recyclable containers, reducing waste and contributing to a more sustainable lifestyle.
4. A Creative and Therapeutic Process
Crafting your own lip balm can be a fun and creative endeavor. The process of choosing ingredients, blending them, and experimenting with textures and scents can be therapeutic, offering a calming and enjoyable escape from daily stresses. Plus, it’s an opportunity to create a customized product that truly feels like it’s your own.
5. Perfect for Gift Giving
Homemade herbal lip balms make excellent, personalized gifts. Whether for holidays, birthdays, or just as a thoughtful gesture, a jar of handmade lip balm can be a charming and useful present. With the addition of decorative packaging, it’s a gift that shows care and effort, making it feels even more special.
In conclusion, making herbal lip balm at home is an empowering choice that provides you with all-natural ingredients, a customizable formula, and the joy of crafting something uniquely your own. Whether for personal use or as gifts, homemade lip balm is a practical, eco-friendly, and creative way to care for your lips while enjoying the process.
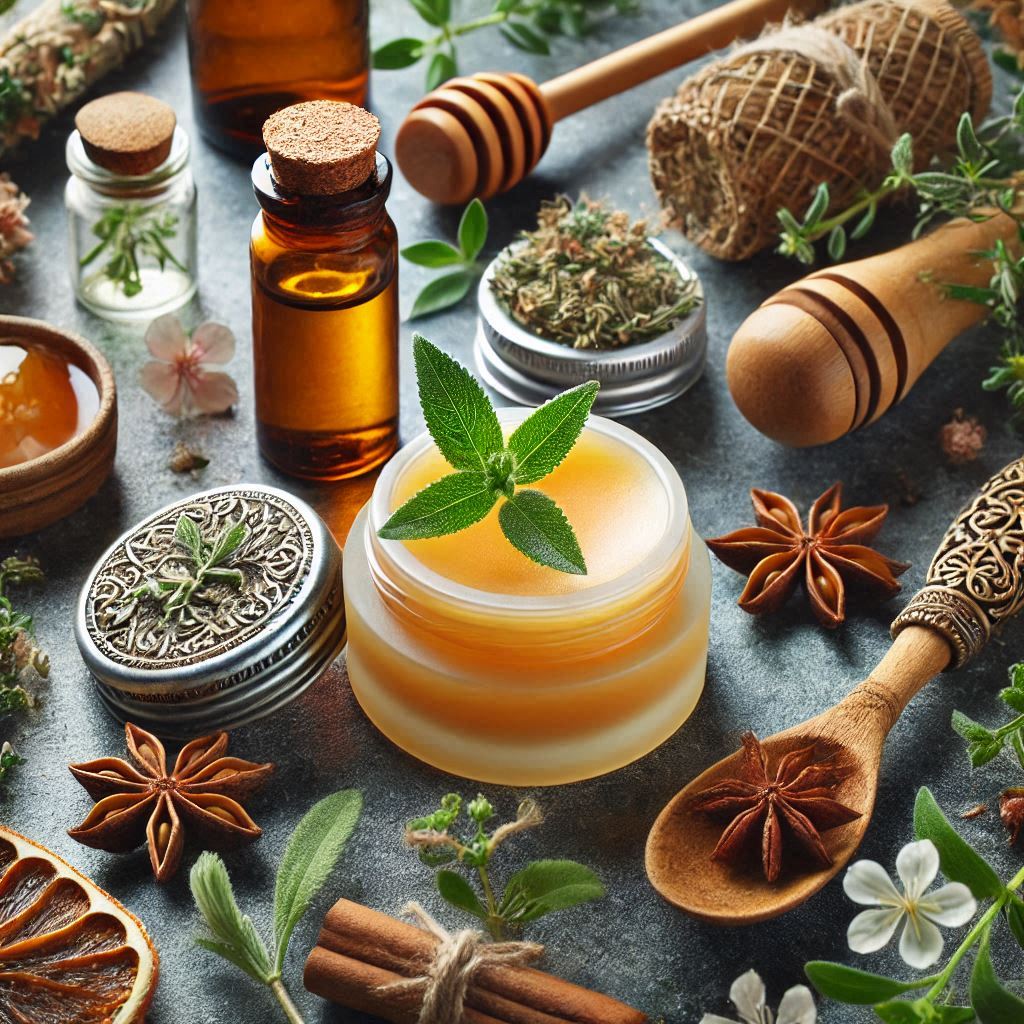
Understanding the Key Ingredients
Creating a perfect lip balm requires a balance of nourishing, moisturizing, and protective ingredients. Each ingredient plays a specific role in achieving the ideal texture and effect:
Base Ingredients
- Beeswax (or Vegan Alternatives):
Beeswax acts as a natural thickener, giving the balm its solid structure while providing a protective barrier to seal in moisture. Vegan substitutes like camellia or carnauba wax work just as well. - Butters (Shea, Cocoa, or Mango):
Butters add rich hydration and a creamy texture. Shea butter is particularly beneficial for healing cracked lips, while cocoa butter imparts a subtle chocolate scent. - Carrier Oils (Infused or Plain):
Oils like almond, jojoba, or coconut deeply moisturize and carry the benefits of any infused herbs into the skin. Infused oils add an extra layer of therapeutic properties.
Additives
- Essential Oils:
A few drops of essential oils like peppermint, vanilla, or lavender add aroma and additional benefits. Peppermint is cooling and refreshing, while lavender is calming. - Natural Colorants:
Ingredients like beetroot powder, alkanet root, or mica powder give your balm a tint. Ensure the colorants are lip-safe. - Honey or Vitamin E:
Honey is a humectant, meaning it draws moisture into the lips. Vitamin E acts as a preservative and antioxidant, extending the shelf life of your balm.
Step-by-Step Guide to Making Herbal Lip Balm
Preparation
Before you begin, gather your tools and ensure your workspace is clean. Here’s what you’ll need:
- Double boiler or heat-safe bowl
- Small spatula or stirrer
- Lip balm tins, tubes, or jars
- Measuring spoons
- Cheesecloth or fine mesh strainer (for infused oils)
- Labels for customization
1. Creating Your Herbal Infused Oil
Herbal-infused oils are the secret to making your balm both nourishing and therapeutic. Here’s how to make them:
- Choose Your Herbs:
Select dried herbs like calendula (healing), chamomile (soothing), or lavender (calming). Fresh herbs are not recommended as their moisture content can spoil the oil. - Infusion Methods:
- Quick Method: Gently heat ½ cup of your carrier oil with 2 tablespoons of herbs in a double boiler for 1–2 hours. Strain and store.
- Slow Method: Place herbs and oil in a jar and let them steep for 2–4 weeks in a warm spot, shaking daily. Strain before use.
- Strain the Oil:
Use cheesecloth to filter out herb particles, leaving behind only the infused oil.
2. Melting the Base Ingredients
- In your double boiler, melt 1 tablespoon of beeswax along with 1 tablespoon of your chosen butter.
- Once melted, add 1 tablespoon of the infused oil. Stir until everything is fully combined.
- Test the consistency: Place a small amount on a spoon and let it cool to room temperature. Adjust with more wax for firmness or oil for softness.
3. Adding Custom Touches
- Stir in 3–5 drops of essential oil.
- Mix in honey, Vitamin E, or natural colorants. For a pearlescent effect, add a pinch of mica powder.
4. Pouring and Setting
- Carefully pour the liquid balm into your prepared containers.
- Allow it to cool and solidify completely (about 1 hour).
- Seal the containers and label them.
Customization Ideas
For Dry or Cracked Lips
- Add calendula-infused oil for its healing properties.
- Include honey and Vitamin E to lock in moisture.
For a Refreshing Sensation
- Use peppermint essential oil for a cooling effect.
- Add a touch of menthol crystals for extra tingle.
For a Tinted Balm
- Mix in beetroot powder or alkanet root for a natural reddish hue.
- Experiment with mica powders for soft shimmer or bold colors.
Troubleshooting and Tips
1. Balm Feels Too Greasy
Adjust by increasing the amount of beeswax in the recipe.
2. Balm is Too Hard
Reduce the beeswax slightly or add more carrier oil.
3. Scent Fades Quickly
Essential oils are volatile and evaporate quickly in high heat. Add them once the melted mixture cools slightly.
4. Balm Won’t Set
Ensure the beeswax-to-oil ratio is balanced. Too much oil prevents solidification.
5. Shelf Life Concerns
Store in cool, dark places, and use Vitamin E as a natural preservative.
Elevating Your Herbal Lip Balm Experience
- Eco-Friendly Packaging:
Opt for biodegradable tubes or recyclable tins. Decorate with Kraft paper labels and handwritten notes for a charming touch. - Personalized Gifts:
Create themed balms (e.g., “Soothing Lavender” or “Spiced Vanilla”) and package them in gift boxes. - Add Floral Aesthetics:
Sprinkle crushed rose petals or lavender buds on the surface of the balm before it sets.
Why This Herbal Lip Balm Outshines Store-Bought Options
1. Truly Natural and Safe
Unlike commercial lip balms laden with chemicals, your homemade creation is 100% natural and tailored to sensitive skin.
2. Therapeutic Benefits
By infusing oils with herbs, you add therapeutic value that addresses specific concerns like inflammation, dryness, or irritation.
3. Luxurious Appeal
With the right presentation and attention to detail, your DIY lip balm can feel like a high-end spa product.
Frequently Asked Questions
How Long Does Homemade Lip Balm Last?
If stored properly, most DIY lip balms have a shelf life of 6–12 months. Adding Vitamin E or keeping them in cool, dry environments can prolong their freshness.
Can I Skip the Beeswax?
Yes! Use plant-based waxes like camellia or carnauba for a vegan-friendly version.
How Do I Make the Balm Glossier?
Incorporate castor oil or a few drops of cosmetic-grade lanolin for a glossy finish.
Conclusion
Crafting herbal lip balm at home isn’t just about creating a practical product; it’s about indulging in self-care, experimenting with nature’s finest ingredients, and adding a personal touch to something you use daily. Whether you’re making it for yourself or gifting it to loved ones, this DIY herbal lip balm is a luxurious and sustainable alternative that delivers incredible results.
So, gather your ingredients, unleash your creativity, and transform your lip care routine into an artisanal experience!
SOURCES
Dr. Axe – Natural Remedies and Skincare (2014)
The Spruce Crafts – DIY Beauty Recipes (2017)
Aroma Web – Essential Oils and DIY Beauty (1997)
Love Health – Herbal Recipes (2016)
The Natural Beauty Workshop (2007)
HISTORY
Current Version
November, 30, 2024
Written By
ASIFA